Did you know that on any given day, home water damage emergencies affect 14,000 people?
A leaky faucet is more than just an annoying drip, it can also lead to higher water bills and wasted water.
You don’t want to pay extra for something that you’re not using, and you certainly don’t want your home’s plumbing system to be damaged by a leaking faucet.
Don’t worry – fixing a leaky faucet doesn’t have to be difficult or expensive. With the right tools and knowledge, anyone can learn how to fix this issue quickly and easily!
Keep reading to find out exactly how to fix it!
Identify the Type of Faucet
When it comes to fixing a leaky faucet, it’s important to first identify what type of faucet you have. If you live in an older home, chances are you have a compression faucet, which works with a single handle that connects to two valves.
For newer homes, cartridge faucets are more common and operate with one or two handles that control a cartridge within the valve body. Knowing what type of faucet you have will help you determine the right replacement parts and make the necessary repairs.
Before you grab your toolbox, take a moment to properly identify your faucet to ensure a successful fix.
Grab the Tools You Need
Whether you’re a professional plumber or a DIY enthusiast, grabbing the right tools is a crucial first step to successfully repairing a leaky faucet. With so many different faucet types and leaks, it’s important to have a variety of tools at your disposal.
Wrenches, pliers, and screwdrivers are just the beginning – you may also need specialized tools depending on the specific issue you’re facing. Before starting your project, take the time to gather all your supplies so that you can work efficiently without any interruptions.
With the right tools in hand, you’ll be well on your way to fixing your leaky faucet and enjoying a fully functioning plumbing system.
Turn Off Water Supply
Before you grab your toolbox to fix that pesky leaky faucet, remember to turn off the water supply first. This may seem like an obvious step, but it’s easy to forget when you’re eager to get the job done. By turning off the water supply, you can prevent any further water damage from occurring during your repair.
Once the supply is turned off, take the extra step of draining the pipes to ensure that there’s no leftover water lurking in the system. With a dry and safe workspace, you’ll be able to tackle that faucet with confidence.
Disassemble Faucet
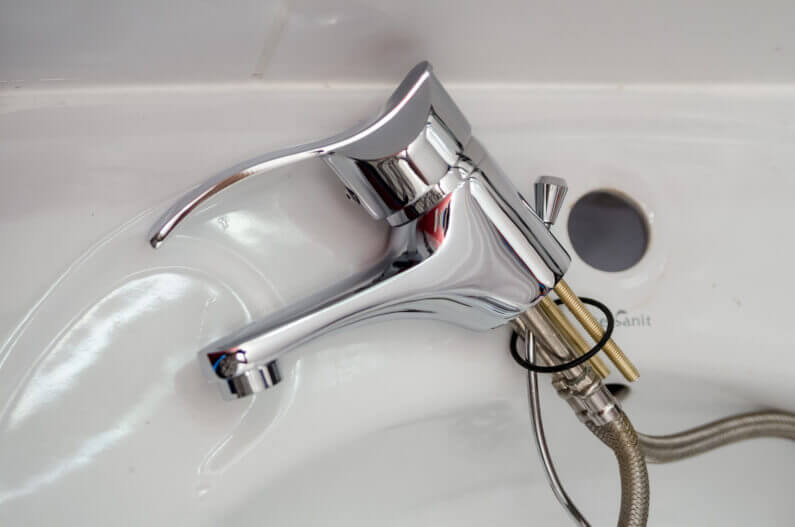
Taking apart a faucet might seem like a daunting task, but with a little bit of patience and preparation, it can be a straightforward process. First, figure out what type of faucet you have and determine which parts will need to be removed.
As you disassemble the faucet, keep a bucket or tray handy so that you can keep any small parts from getting lost. Once everything is apart, take a careful look at the individual components to see if there is any damage or wear and tear that will need to be addressed.
Taking the time to carefully inspect your faucet can help you identify potential problems early, and ensure that your plumbing remains in good condition for years to come.
Replace Damaged Parts
Maintaining a fully functional faucet in your home is essential for a smooth and hassle-free daily routine. However, if you notice any damaged or worn-out parts in your faucet, it’s crucial to replace them immediately. You can easily purchase replacement parts from your local hardware store or home improvement center.
But don’t just choose any replacement parts, pay attention to detail and select the right parts. Ensuring that they fit perfectly into their designated spots in the faucet assembly. With this simple replacement process, you can enjoy a perfect running faucet that makes your daily routines easier, without any leaks or breakages.
Reassemble Faucet
Now that you’ve successfully replaced all the necessary parts of your faucet, it’s time to put everything back together. This step-by-step process, known as reassembly, requires caution and precision to ensure everything is secure, snug, and leak-free. Start by reversing the disassembly process you undertook earlier.
Take your time and carefully thread the components in the correct order. Triple checking that everything is securely attached, but again, avoiding over-tightening. With patience and attention to detail, you’ll have your faucet back in tip-top working order in no time.
Test Out Your Repair
After completing a DIY repair job on your faucet, there’s nothing quite like the satisfaction that comes from knowing you fixed it yourself. But before you pat yourself on the back, it’s important to test out your handiwork. Turning on the water supply is a crucial step that will determine whether or not your repair was successful.
A looming fear of leaks or drips can create a cloud of uncertainty, but if you don’t see any signs of trouble, you can breathe a sigh of relief. However, if problems persist, calling a plumber for further assistance is the best thing to do. Remember, safety comes first, and it’s always better to be safe than sorry!
Fix Your Leaky Faucet Today
Fixing a leaky faucet in your home doesn’t have to be a daunting task. By following the steps outlined above, you can quickly and easily repair this issue yourself.
However, if you’re unsure about tackling this project on your own or need additional assistance, Plumb Time Plumbing is here for you! Our experienced plumbing technicians are available 24/7 to help with any of your residential needs.
Contact us today for more information about our services – we look forward to hearing from you about your plumbing problems.


